300000k+ front end service, H.D Drag Link set up, Lower Control Arms- Ball Joints, Bushing replacement. Sway bar bush and link kit. Wheel Bearing R/R,

Nissan Navara Forum

Help Support Nissan Navara Forum:

This site may earn a commission from merchant affiliate links, including eBay, Amazon, and others.

Been a while

Member
Joined
Dec 18, 2017
Messages
957
Reaction score
82
Location
qld
Howdy all, going by the left hand outer "tyre wear" things need to be done to correct the issue.. dammit! Last alignment they said they had issues with it and dropped the hight, but obviously thaAat didn't work!!!

So I've been slowly picking up and gathering the parts needed to give the ol'girl a freshen up.. 300000+ks and by the look of the ORIGINAL lower ball joints boots, she needs doing,,tiz sitting rather low in the boots.. grrr the worst job everrr x3! I've been putting this off for aaaaAges too...

Parts are coming in no probs, but it's the job itself that has me on the back foot, I've got no where to do it other than the camp site... So that means being well prepared and prepared for the worst also.. Breaking the rod ends and lower ball joints has me a little concerned,, and popping that Inner Rear LCA Chassis Bush too!
I grabbed new Complete L.C.A so I don't have to worry about pressing ball joints in and out, plus the bush! @ $175 ea why would you bother with the press and shop time$!

I've got heat, hammer and log splitter, and a pully kit for the joints! Cordless drill, hacksaw blades and hand tool, punch etc for Chassis bush.. generator for the "grinder axe" too ;) for stuck L.C.A inner rear bush Pins!
New pins and hardware coming!

My stuff in storage is close so trolley jacks and stands are good, the ground here is solid "central Vic gold fields", so that's a bonus and a good start.. go for it ya reckon:)

The U.C.A bushings, ball joints should be fine, shocks should be fine and the tie rods look "ok" to me- I'll know better when the draglink comes off. Still, those parts can be done latter if needed, I can't afford to be pre purchasing those parts too at the moment.. I'll see how my AfterPay account is going;) though! I hate double handling mechanical works, I'd rather R/R whilst I'm there, but $$$ tight..

Drag link look easy enough! Thinking ahead, I brought some "shim plate" material at different thickness in prep for that job.. I'm thinking "we" may need to also look at the "Idler Arm" positioning too... But the shim plate is purely for fine tuning of that drag link seating to Idler Arm- That's at "this" stage of the "thought mechanics" process lol, I can't help it, stinking mind has to go over everything 4 times before I get the confidence to "get at it"..

Sway bar kit is nothing, it's the joint separation that has me thinking eh.. One bloke said he loosened his L.C.A Ball Joints a couple of turns, re fitted split pin and drove it before trying to R/R lol classic Huh... And yes, I'm considering it! Driving it round camp a few times untill they crack thier seating... any votes lol ball joint is being replaced anyway!
 
To be honest, the U.C.A Ball Joints look like they're sitting a little low in the boot also, not that it in itself is a wear indicator but,,,, the lower ones have folded that far into themselves the boots are cracking lol
 

Attachments

  • 20211021_150944.jpg
    20211021_150944.jpg
    1.9 MB · Views: 20
  • 20211021_150920.jpg
    20211021_150920.jpg
    1.7 MB · Views: 19
  • 20211021_150854.jpg
    20211021_150854.jpg
    1.6 MB · Views: 20
  • 20211021_150832.jpg
    20211021_150832.jpg
    1.6 MB · Views: 17
Ooooonewwww parts ;) These look the goods! I thought well priced, considering good ball joint and bush will set you back over $120 a side easy! Not worth driving to the local shop... Chassis bush was an extra $40 per side though.. still, better than finding a press or buying a G Clamp removal tool for the ball joints and bushes from superbleep..
 

Attachments

  • 20211021_151041.jpg
    20211021_151041.jpg
    2.1 MB · Views: 15
  • 20211021_151600.jpg
    20211021_151600.jpg
    2.1 MB · Views: 15
New control arms too, I thought they may have been remanufactued parts but no!

Lol, ball joint looks a lot fresher than what's in it!

Stupid not to do the U.C.A Ball Joint too huh ok, ok, yes yes yes! first rule of nav club- buy well and do it properly, because if ya don't it will come back too bite ya in the A, hard,,with no lube;)
 

Attachments

  • 20211021_151607.jpg
    20211021_151607.jpg
    1.8 MB · Views: 11
  • 20211021_151611.jpg
    20211021_151611.jpg
    1.9 MB · Views: 11
Ooo new chassis bush! Not looking forward to fitting this baby! More so removal of the old and getting too it!!

The poor blokes in the snow regions with the road salt, lol have a look on utube regarding L.C.A inner rear bush pin removal! The rust! I couldn't live there! I couldn't even work on them!

Job done mum, new one already to go!
 

Attachments

  • 20211021_154329.jpg
    20211021_154329.jpg
    2.5 MB · Views: 17
  • 20211021_154343.jpg
    20211021_154343.jpg
    685.4 KB · Views: 15
Shims came today.. very handy! Especially the .25 I reckon..

This way I can make square washers "if needed" to sit the supplied "round shim washers" on- for finer adjustments if needed..
 

Attachments

  • 20211021_154046.jpg
    20211021_154046.jpg
    1.2 MB · Views: 7
  • 20211021_154041.jpg
    20211021_154041.jpg
    935.7 KB · Views: 7
So it's a waiting game on parts now!

Got Jack, have stands- zedly's bush garage is now open! Even put some permanent "wheel chocks" in the factory floor this morning...
 

Attachments

  • 20211021_151058.jpg
    20211021_151058.jpg
    2.9 MB · Views: 13
  • 20211021_151120.jpg
    20211021_151120.jpg
    3.1 MB · Views: 12
Factory shop floor heater is finished :) yes i get bored of an evening, this started off as a small hole a week and a bottle of Bundy ago ;)
Got a bottle of jack now, I'm thinking decking! Water feature!

Ya have to have a little bit of level ground to stand on whilst getting warm by the fire... plus it whizzed down "like end of days rain" and i got flooded out,, minor civil works where needed ;)

Currently waiting on Ranger Police and fine$!
 

Attachments

  • 20211021_160221.jpg
    20211021_160221.jpg
    4.2 MB · Views: 13
  • 20211021_151154.jpg
    20211021_151154.jpg
    4.6 MB · Views: 13
  • 20211021_151232.jpg
    20211021_151232.jpg
    4 MB · Views: 13
  • 20211021_151058.jpg
    20211021_151058.jpg
    2.9 MB · Views: 11
So there you go! Dug in for a few weeks and we'll see if I can work myself up to do the job...
Have reception, 2 mile walk to main road if needed, 15 min drive from Maryborough so water and food are all good, I'll stock up prior to taking her off the raod.. Plus Woolworth will deliver this far out if needed lol, I just have to get to the main road, classic huh.. I'll stick a fake lot number at the tracks entrance and wait there for deliveries ;)
Parts too I reckon, if needed...

If I do go for it, it's only 15min to get the alignment done afterwards... lol, I'm seriously considering this... it has to be done and I can't afford to pay another to do it.... sooooo,,,,

I guess its all up to finding parts and the delivery of them..
 
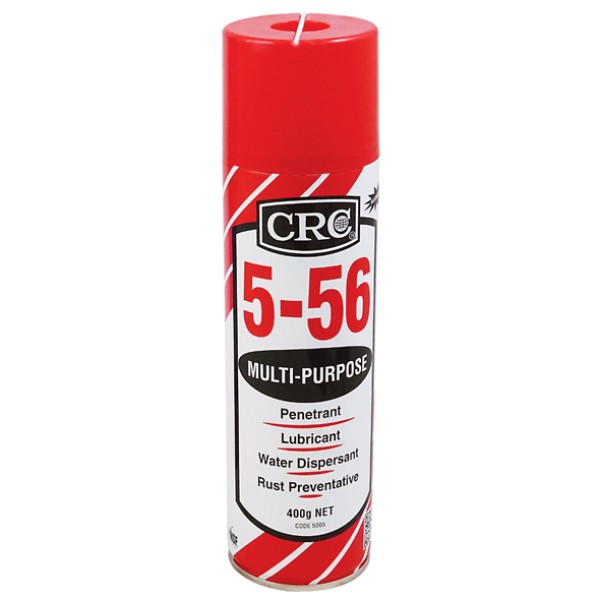
Mate, you left out the most important part! Not only effective for fan belts but fixes ball joints and nearly anything else. Get a spare tin and it won't matter if you run out of tomato sauce! lol.


CA1851%20CRC%205-56%20MULTIPURPOSE%20400G%20LUBRICANT%20AEROSOL-600x600.jpg
 
The shops power supply slowly vibrating its way out of it E.P.A approved noise cancelling station...

Yes, we can run the "grinder axe", but, more importantly- the shops lunch rooms air fryer! Ha, weep forefathers! We have air fryer...
 

Attachments

  • 20211021_170213.jpg
    20211021_170213.jpg
    5.3 MB · Views: 19
Mate, you left out the most important part! Not only effective for fan belts but fixes ball joints and nearly anything else. Get a spare tin and it won't matter if you run out of tomato sauce! lol.


CA1851%20CRC%205-56%20MULTIPURPOSE%20400G%20LUBRICANT%20AEROSOL-600x600.jpg
🤭Never leave home without it, geez, I know the second rule of Nissan Club by now!

God dammed hard arses you lot! Always with the rules...
 
Hahaha smart arse, classic lol
I actually removed my smart arse comment too lol thought, nah, let it go and you! YOU! Lol welcome to being the most evil man on NavaraAsia;)

Here,,let me light the shop heater and pour you a short stiff one! It's all down hill from here,,, Boss ;)
 
Don't stress, fire fighting gear at the ready...

And doubles as a wash down tool for a pre clean before works commences... Here at Zedly's shop we don't work on pigs thank you!

And if you're looking for a summer wash down at the beach! Never travel with out one, I've even heated the water for a shower... true story folks, no crc involved!
 

Attachments

  • 20211021_173457.jpg
    20211021_173457.jpg
    3.5 MB · Views: 9
Last edited:
lower ball joint removal without tools use hammer, jack block ,of wood

never hit the thread part of ball joint(top of bolt) .,hit the casting that holds the bolt. In most cases on one side of casting i hold a block of metal or a very heavy hammer while you bash the shit out of the opposite side
 
lower ball joint removal without tools use hammer, jack block ,of wood

never hit the thread part of ball joint(top of bolt) .,hit the casting that holds the bolt. In most cases on one side of casting i hold a block of metal or a very heavy hammer while you bash the shit out of the opposite side

So you don't recommend driving round with loosened nuts on the ball joint ;)

Thanks for the video man, cheers..

Good video.. lol but the hammering!
 
Last edited:
The sun was out with no rivers running through the work shop so I thought I'd try replacing the Rrag link..

Ok, so all the joint nuts off, a little heat and a tap and out she came .. These little gas torches are the go! Great for directing the flame and heat away from the joints rubber dust boots!
The the rod end are perfect so saving them saved a $100to $200!
 

Attachments

  • 20211022_150858.jpg
    20211022_150858.jpg
    2 MB · Views: 8
So with the old, out! I started the installation.. I went my own way at the start because I wanted to see exactly where the joint sat, depth wise in the Idler Arm seat.. Then I could take a measurement of the complete joint to help with shiming the steering box, IF needed...

Make sure to write down the measurement somewhere safe...
 

Attachments

  • 20211022_113440.jpg
    20211022_113440.jpg
    1.5 MB · Views: 8
  • 20211022_113741.jpg
    20211022_113741.jpg
    2.3 MB · Views: 7

Latest posts

Back
Top